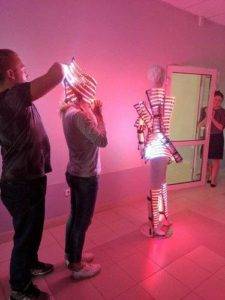
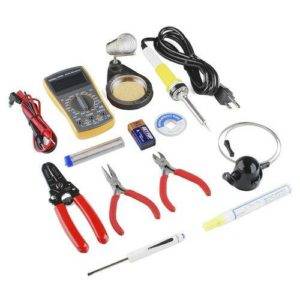
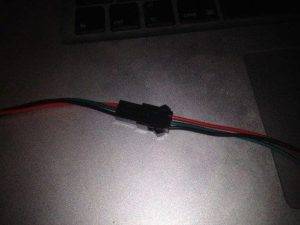
2018 How to resolder wire or change leds on SMART LED light up rainbow isis wings? By admin. Posted on 20.08.2018 Good day my friendsI continue to write a series of articles on repair our favorite wings.We sell a lot of them and they periodically break. Some customers are changing to new – and some repair by themselves. For them we are doing all of these instructions.Smart led light up rainbow isis wings in actionAs usual, after the failure, we ask the client to send the video to a malfunction. And the customer sent to us this video:In this video we can see that part of the wing is operating normally and the other part is not. We see the light noise. This item 3.1 or 3.2 of the repair manual on first look. Because the working part of the wing, and the other part is not working.3.1 – Damaged control wire between the two LEDs.3.2 – LED factory defect – and he stopped to send a control signal to the next LED.We first consider Paragraph 3.1Firstly turn on wingsTry to find the last normal working LED in the chainAfter the last working LEDs we found broken wireSometimes it can be a broken wire inside the containment, but it can be pulled out and wire will come outFor fix you need some soldering equipment and parts from repair kitYou need next equipment for work:Solder ironSolderWire cutterRepair kitSeparate LEDs on the wingYou see the LED in the containmentCarefully cut off the shellLike thisTouch a soldering iron to the shell and heat the glue insideWhen the glue is warmed up, it will become soft – just pull the shell downCut shell remnantFrom torn wires must be removed shell and prepare it for solderingAdd at the end of the solder wireLike thisLocate the LED leg without wiresAttach the wire to the prepared leg of the LEDAnd solder itEverything is ready – you need to restore the protective shellCut one of the wires in the middlePrepare the ends of the wires to solder – as we did aboveTake the protective cover from the repair kitAdd solder to ends of wiresLike thisUse shells, big for leds and small to cover wiresSolder two wires together – as it was beforeLike thisRepeat for the second wireRepeat the same for the third wireUse the glue gun and Apply glue to the place of solderingLike thisPull the protective cover on the glueRepeat this for all three wiresUse a soldering iron to heat up the protective shellTake a large protective shellAnd pull it to the LEDUse a glue gun and Apply glue inside the containmentFrom one sideFrom second tooLike thisUse the plastic mounting of the repair kit, and attach the LED at its original placeLike thisCut the rest by cuttersDoneAfter connecting, we see that both sides of the wing workNext consider Paragraph 3.2The main difference is that you need to replace the LED. Sometimes factory marriage, and it can only be replaced.Usually need to replace a malfunctioning first LED in the chain, but if that does not work you need to replace the last well-functioning LED.The first stage is to remove the protective cover from the LED.LED connection circuitIt is very important – do not mix up the order of connection, be very careful and do everything strictly according to instructions or circuit diagram.That’s what you need from the repair kitTake the prepared LED and see how it is solderedCut the LEDs legs like on photoLike thisAdd solder to ends of legsLike thisTake two LEDs so that the procedure for connecting the same (black dots inside the LEDs must be at the top)Unsolder first wire and solder it to the same place, but the new LEDLike thisRepeat with the next wireLike thisAnd also with the third wireAnd also with the last wireLike thisAfter all this – you need to put on the LED protective cover and test – how to do this can see above We have completed the repair of torn wires, thank you for what you are spending your time on all this. You get a great experience and can correct such failure in the future on their own and very quickly.That’s how they look at work: Thank you for reading from all our team – ETEREshop!!! Follow us on FB | Instagram | YouTube | Twitter | VK | Buy directly from US | Buy on Etsy
Good day my friendsI continue to write a series of articles on repair our favorite wings.We sell a lot of them and they periodically break. Some customers are changing to new – and some repair by themselves. For them we are doing all of these instructions.Smart led light up rainbow isis wings in actionAs usual, after the failure, we ask the client to send the video to a malfunction. And the customer sent to us this video:In this video we can see that part of the wing is operating normally and the other part is not. We see the light noise. This item 3.1 or 3.2 of the repair manual on first look. Because the working part of the wing, and the other part is not working.3.1 – Damaged control wire between the two LEDs.3.2 – LED factory defect – and he stopped to send a control signal to the next LED.We first consider Paragraph 3.1Firstly turn on wingsTry to find the last normal working LED in the chainAfter the last working LEDs we found broken wireSometimes it can be a broken wire inside the containment, but it can be pulled out and wire will come outFor fix you need some soldering equipment and parts from repair kitYou need next equipment for work:Solder ironSolderWire cutterRepair kitSeparate LEDs on the wingYou see the LED in the containmentCarefully cut off the shellLike thisTouch a soldering iron to the shell and heat the glue insideWhen the glue is warmed up, it will become soft – just pull the shell downCut shell remnantFrom torn wires must be removed shell and prepare it for solderingAdd at the end of the solder wireLike thisLocate the LED leg without wiresAttach the wire to the prepared leg of the LEDAnd solder itEverything is ready – you need to restore the protective shellCut one of the wires in the middlePrepare the ends of the wires to solder – as we did aboveTake the protective cover from the repair kitAdd solder to ends of wiresLike thisUse shells, big for leds and small to cover wiresSolder two wires together – as it was beforeLike thisRepeat for the second wireRepeat the same for the third wireUse the glue gun and Apply glue to the place of solderingLike thisPull the protective cover on the glueRepeat this for all three wiresUse a soldering iron to heat up the protective shellTake a large protective shellAnd pull it to the LEDUse a glue gun and Apply glue inside the containmentFrom one sideFrom second tooLike thisUse the plastic mounting of the repair kit, and attach the LED at its original placeLike thisCut the rest by cuttersDoneAfter connecting, we see that both sides of the wing workNext consider Paragraph 3.2The main difference is that you need to replace the LED. Sometimes factory marriage, and it can only be replaced.Usually need to replace a malfunctioning first LED in the chain, but if that does not work you need to replace the last well-functioning LED.The first stage is to remove the protective cover from the LED.LED connection circuitIt is very important – do not mix up the order of connection, be very careful and do everything strictly according to instructions or circuit diagram.That’s what you need from the repair kitTake the prepared LED and see how it is solderedCut the LEDs legs like on photoLike thisAdd solder to ends of legsLike thisTake two LEDs so that the procedure for connecting the same (black dots inside the LEDs must be at the top)Unsolder first wire and solder it to the same place, but the new LEDLike thisRepeat with the next wireLike thisAnd also with the third wireAnd also with the last wireLike thisAfter all this – you need to put on the LED protective cover and test – how to do this can see above We have completed the repair of torn wires, thank you for what you are spending your time on all this. You get a great experience and can correct such failure in the future on their own and very quickly.That’s how they look at work: Thank you for reading from all our team – ETEREshop!!! Follow us on FB | Instagram | YouTube | Twitter | VK | Buy directly from US | Buy on Etsy